VisionFive 2: My Getting Started Story
I bought a StarFive VisionFive 2 development board (produced by Waveshare) from Amazon Germany and this my getting started experience.
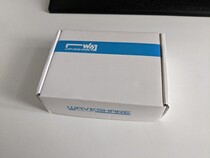
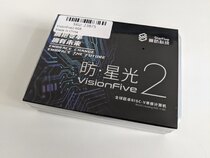
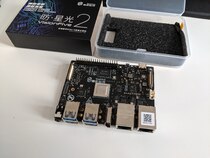
The Waveshare VisionFive 2 development board was available from Amazon for ~120 EUROs incl. taxes and shipping (from China), which I thought was a fairly reasonable price to checkout the state of risc-v today, so I bought one. The board came in a small box which was padded and contained a small plastic container that held the development board.
No stand-offs or spacers were included but I managed to salvage some from another board I was playing with. There is also no charger or usb-c cable but those are easy to source from all my other devices.
Here’s the unboxing pics.
There was no documentation hints in the box so I dropped into Google to try to find out how to get started. The first links led me to the official website which has an official getting started guide as a pdf and as HTML.
- https://starfivetech.com/en/site/archive
- https://starfivetech.com/uploads/VisionFive%202%20isionDocumentation.pdf
The flashing instructions state that there are pre-built Debian system images available on their Google Drive and/or Baidu Drive. I looked through both and found I couldn’t trivially download from the Baidu drive anonymously and through the browser so I stayed with the Google drive links.
Flashing instructions say Debian system images available on their Google Drive or Baidu Drive.
- https://doc-en.rvspace.org/VisionFive2/Quick_Start_Guide/VisionFive2_QSG/flashing_with_mac_linux.html
- https://drive.google.com/drive/folders/1cctIVdCfbPhKpyQ0PcmCQ92KCQjJ8JI5
There were some different versions of the files available. I downloaded the Debian system image from the newest version (v65) and flashed it with Balena Etcher to a microSD card. I popped the microSD card into the board, connected the board to my monitor (~34 inch ultrawide) via HDMI, my keyboard/mouse via USB, and my home router via a network cable and powered it up with my phone charger (USB-C).
Nothing.
The screen stayed off and according to my router it didn’t get assigned an IP address via DHCP.
I began the archeological dig through forum posts, reddit posts, and blog posts:
- https://www.reddit.com/r/RISCV/comments/104qcpu/visionfive_2_boot/
- https://www.reddit.com/r/RISCV/comments/zzhc5s/riscvboard_erste_schritte_mit_starfive_visionfive/
- https://forum.rvspace.org/t/visionfive-2-debian-image-december-released/1097
- https://doc-en.rvspace.org/VisionFive2/PDF/VisionFive2_QSG.pdf
- https://www.jeffgeerling.com/blog/2023/risc-v-business-testing-starfives-visionfive-2-sbc
- https://doc-en.rvspace.org/VisionFive2/Quick_Start_Guide/VisionFive2_SDK_QSG/updating_spl_and_u_boot%20-%20vf2.html
I learned that older versions of the board needed a “complex” firmware update process and newer versions of the board can be more trivially updated. I had some luck here and learned my board was the newer version.
It took some time to narrow down the flashing instructions for my board version since there was a sea of varying flashing instructions because of the mixed versions but I eventually narrowed it down. I simply needed to download three files from the VisionFive2 GitHub project and use them to update the the board firmware.
- https://github.com/starfive-tech/VisionFive2/releases
- sdcard.img
- u-boot-spl.bin.normal.out
- visionfive2_fw_payload.img
I used Balena Etcher to write the sdcard.img to the microSD card and booted the board up. This showed me a a boot up sequence indicating it was some customised system image built with buildroot. I scp’ed the two firmware files via network to the running system and then used the flashcp commands to update the firmware.
At first this didn’t work seem to work as when I next tried to boot the Debian system image again it still didn’t respond but I found it was because I had used an older version of the firmware update files. (The result of me following a direct link from another blog post to download the firmware files which linked to an older release. After navigating directly to the project’s GitHub releases page and ensuring I used the latest files, I was able to flash the latest version of the files which then enabled the Debian system image to boot.
Later I found this blog post that matches what I had to work through. It was a pity I didn’t catch that post earlier.
Now I have a booting board. One thing to note though is that although it seems to work with my 34” monitor, the colours are coming out wrong with some kind of pink/purple tint. My next plans are to try booting up a Fedora system image on the board to check out the state of Fedora on risc-v.
P.S. A good quality review that I found on the board’s performance.
https://www.cnx-software.com/2023/02/12/starfive-visionfive-2-sbc-review-debian-12


